Wednesday, December 21, 2011

Rainbow Jell-o


I left you hangin’ with my last post. I should have said something like, “and the rest is history”. Since there is no fun in that, I’ll just tell the rest of the story.

…So this boy that my heart was in love with drove home with me for Thanksgiving weekend. It was the first time I remember not hating the 4-hour drive. What did I say? What did we talk about? I certainly don’t remember anymore, but I do remember getting kind of nervous as we pulled up to my parents’ house. My brain kept trying to tell the rest of me that this guy was just a friend and it was no big deal (apparently my brain didn’t get the memo that this was a very big deal).

I was sure that by the time we pulled in, my mom would have heard at least heard one of the message I’d left on the machine (we didn’t have cell phones back then so there was no way to get in touch as we traveled) and so coming through the door with a friend wasn’t going to be a total shock. (This is where I need to insert my mom’s side of the story because I think she’ll remember it how it really happened and not how my flooded-with-dopamine brain recalls it.)

My friend and I walked in the front door and I remember everyone running to us all excited and patting my friend on the back and welcoming us into the home and he into the family. We recounted the details of the past 24 hours and had my mom fill in the missing details from her end. After all that we settled into our weekend and the reality of what was happening.

We enjoyed a fabulous meal for Thanksgiving (complete with layered jell-o …got to get the recipe plug in here) and by the end of the weekend faced that music that we were so sickly sweet in LOVE with one another that we didn’t quite know what to do with ourselves. We returned to school and decided to play it off casual (we didn’t want our friends to abandon us because to a person NOT in throws of a new romance, there is nothing more annoying than two people who are). You could maybe then imagine everyone’s surprise, when 2 months later, Boy asked me to marry him and I said YES!

You’re now thinking…Rainbow Jell-O? That is the tie in? I know it’s a stretch but lets be honest…what ISN’T a stretch with me?!
J What can I say, it’s a memory, just like the one I’ve just shared, that is inalterably connected with our holiday feasts.

A few years after Boy and I got married the jell-o became my assignment for the meal. Much like my relationship with Boy, it’s a constant and every year I make some tweaks and adjustments to make it better. And like my relationship with Boy, It’s not too incredible difficult, just apply some patience and time and it usually turns out great.
J


My Cousin Mickelle had the best seat in the house for the Jell-o Mold photo op. 
I lifted this picture from her blog - stop by and say hi.

Rainbow Jell-O Mold

Yield: 1 bunt pan size jell-o mold

Ingredients:
8 - 3 oz boxes of various jell-o flavors (NOT sugar free)
1 - 14 oz. can sweetened condensed milk
Boiling water

Directions:
  1. Spray pan with cooking spray
  2. Boil water and pour 1 ¼ cup into a small bowl with 1 pkg. of gelatin (the color that will be your top layer). Stir until dissolved.
  3. Pour ¾ cup of the dissolved gelatin liquid into the pan and refrigerate until set BUT NOT FIRM. This can take anywhere from 10-15 minutes and will vary as the layers are built. You know when you are ready for the next layer when the gelatin sticks to your finger when lightly touched. If it doesn’t it’s ok, it just means that your next layer will not FUSE to the set layer and may slip when slicing for serving.
  4. 5-10 minutes before jell-o layer is set, refrigerate the remaining, dissolved gelatin until slightly thickened (consistency of unbeaten egg whites).
  5. Once the set layer is ready, gradually stir in 2-3 Tbsp. of sweetened condensed milk into the remaining dissolved jello to make the opaque layer. Carefully spoon or pour the opaque jell-o over the gelatin set in pan. Refrigerate about 15 minutes or until gelatin is set but not firm (again gelatin should stick to finger when touched).
  6. Repeat steps 2-5 for the remaining layers. Once the opaque layer is in the fridge setting, boil the water for the next layer/color, dissolve the gelatin and set aside to cool so that when you pour it into the pan you don’t melt the set layer.
  7. Refrigerate the entire mold for 2 hours or until firm. Unmold and serve. Store leftover gelatin in refrigerator. 
Notes:
  1. I used 2 boxes of 3 oz. jell-o for the middle layers of the mold so that the layers were thicker. To create the mold in this picture I used a total of 8 boxes of gelatin and my pan could NOT have held more.
HOW TO UNMOLD GELATIN
  1. Dip mold in warm water for about 7-15 seconds. Gently pull gelatin from around edge with moist fingers. Place moistened serving plate on top of mold. Invert mold and plate; holding mold and plate together, shake slightly to loosen. Gently remove mold and center gelatin on plate.
Source: Family File/Kraft recipes (I got the idea to use sweetened condensed milk from the Jell-o Mold Mistress of Brooklyn)

Gwenevere

Wednesday, November 23, 2011

Mom's Apple Pie


Today is Pie Day.
(Not to be confused with Pi Day -March 14th)


On this day in 1997 I was preparing to go home from college for Thanksgiving break. I was almost 20 and I’d met this boy and my heart was in love. Without clearing anything with my mom I asked him to cancel his plans to visit a friend and come home with me instead. I left a dozen messages on my parents phone trying to see if it was ok if I brought someone home with me but finally had to bag it and just head home - with friend in tow. I knew my parents wouldn’t mind. I’d brought plenty of friends home in the past, but this friend was different and I wanted to give them the heads-up, but no one was home.

Pie Day is the day before Thanksgiving that is USUALLY set aside to bake pies and finishing any pre-Thanksgiving Day prep. Why my mom wasn’t doing the usual 14 years ago - I can’t say but that’s ok because I have plenty else to remember from that Pie Day. 

So, today is Pie Day.


While it’s not my turn to be bringing anyone home for Thanksgiving weekend, it is my turn to bake some pies and finish up some pre-Thanksgiving Day prep. I’ve got my list and I’ve got my ingredients and of all the pies that will be made, there is only one that MUST be made – Mom’s Apple Pie.

It’s time to fill up the pie crust with plenty of Golden Delicious Apples and then top it off with a buttery crumb layer that is way too good to pass up.


Mom’s Apple Pie


Yield: 1 pie
Ingredients:
1 pastry pie shell
FILLING:
10 golden delicious apples
½ cup sugar
3-4 teaspoons cinnamon
CRUMB TOP:
1/3 cup sugar
¾ cup flour
6 tablespoons softened butter or butter flavored shortening

Directions:
  1. Peel, core and slice apples.
  2. mix sugar and cinnamon then sprinkle over apples. Put apples into pie pastry until heaping.
  3. Mix flour and sugar in another bowl. Add butter/shortening and cut in with fork or a pastry blender until mixed to a crumb.
  4. Sprinkle over apples.
  5. Cook pie at 400 degrees for 35 to 40 minutes
Source: Family File

Gwenevere

P.S. I know those aren't Golden Delicious Apples. But the Granny smith work too. Sometimes I use whatever I've got.

Saturday, November 19, 2011

Basic Pie Crust


It’s not that I’m completely oblivious to the passage of time. It’s just that I can’t do anything to stop it so I’m having a hard time keeping up. Argh! It’s the middle of November. Thanksgiving is next week and I haven’t written a single list of what needs to be done and what needs to be purchased. So why not get started right now? Lets see… I’m in charge of the rolls, the jell-o mold (I’m Mormon remember)….what else? Drat! I’m forgetting stuff. I knew I should have started this list sooner. OH! The turkey. Good thing I remembered that one. Maybe I’ll throw a pie into the mix.…if I feel like it. But just in case I don’t I’m posting the recipe so you can.

We'll start with the crust because...I'm not makin' a crustless pie.


In my experience, the less you know about pie crusts, the better your pie crusts will be. When I started making crusts all I had to go on was a memory of watching my mom make the crust while I waited to eat the apple skins and the left over pie dough cookies –not so useful. (Basically I was on my own.) For my first few pies, I had to just follow the recipe. After I got the hang of it I tried refining my skill…that’s when things got screwy. Instead of giving you something that isn’t great I thought I’d go back to the basics and remember that while it’s nice to learn new things, sometimes its good to just leave well enough alone. (Yes, you did just hear me say that. You can now pick your jaw up off the floor.)

For real. Just follow this recipe as best you can interpret and DON’T knead the dough.  Do that and you will have a perfectly flakey pie crust for your Thanksgiving pie. Anyway, that’s what I did when I learned and that method worked for me…except for when it failed: once when I tried it in a food processor and once when I kneaded the dough. (Do NOT knead the dough.)

Basic Pie Crust
Yield: 1 pie crust
Ingredients:
1 ½ cups flour
¼ teaspoon salt
6 tablespoons shortening
5-8 Tablespoons ice cold water

Directions:
1. In a medium bowl stir together flour and salt. Using pastry blender or two knives, cut in 6 tablespoons shortening until pieces are pea-size.


2. Sprinkle 1 tablespoon ice water over part of the flour mixture then gently toss with a fork. Push moistened dough to side of bowl. Repeat, using 1 tablespoon of water at a time until all the flour is moistened. (Usually this takes no more than 6 tablespoons.)

3. Form flour into a ball (without kneading).

4. On lightly floured surface, flatten dough. Roll pastry from center to edge into 13-inch circle.

5. Transfer pastry to a 9 1/2-10" deep-dish pie plate with a ¼ - ½-inch rim. (if my crust is stuck to the rolling surface I run my frosting spreader between the surface and the crust to loosen it. 

6. Trim crust edge 1/2-inch beyond pie plate. Tuck the ragged or trimmed edge of the crust under itself.


 7. Flute the edge high.

Notes: If you need your pie shell cooked before you fill it preheat your oven to 450 degrees F. Poke lots of holes into the crust with a fork to release steam, Line pastry with double thickness of foil. Bake 8 minutes. Remove foil; bake 6 minutes more or until golden. Cool on wire rack.

Source: Better Homes and Garden Magazine, November 2008

Gwenevere

Sunday, November 6, 2011

24 hour date

Boy and I left for an overnight date to Louisville, KY on Thursday afternoon. I was a bit giddy with anticipation. It’s been too long since we’ve been on date let alone an overnight one. We drove down with some friends to go see the comedian Brian Regan.  Do you know of Brian Regan? The first time I heard his standup I cried from laughing so hard. This little clip is a portrayal of me in the kitchen…I swear I’m so slow to figure things out. It definitely does not come quickly or naturally yet I love it so.


Before we went to the show we needed to get some goodness in us so we looked around for somewhere to eat. Someone saw Morton’s. “Oh, I’ve heard their good!” said I. After a short Google search we decided we didn’t have the time or the funds to enjoy Morton’s. We parked the car and decided to find a place close to the theater. Just around the corner was a place called Theatre Square. Cute little brick laid street that has several café style restaurants on either side. We chose the Marketplace Restaurant because it wasn’t crowded and they could serve us quickly.

What a fortunate happenstance. This restaurant was the coolest place I’ve been to in a while. It was chic and modern and because I didn’t have my kids with me, I felt like I belonged there. Besides the atmosphere the food was to die for! You know I feel fairly confident with my skills in the kitchen but after eating at the Marketplace, I’m not so sure. I don’t know that I could ever turn out food that was as tasty as what we had. Oh and if anyone is worried about portions, these were all ordered off the appetizer menu.

You may not be able to tell from the pictures but that is scallop on a bed of perfectly seasoned spinach, garnished with chickpeas and a side of pureed sweet potatoes topped with bacon (a/k/a pork belly) strips and drizzled with a spicy red sauce. Everything was cooked to perfection and just melted in my mouth.


Boy ordered the caprese salad. Believe it or not, that was my first taste of a caprese salad. I’ll be dreaming of the nut-free pesto and mozzarella for a while.


We also ordered some flatbread with cheese. That was good too, but there’s not much to write home about on that one…except maybe if I were to duplicate anything we enjoyed from the restaurant, that would be it. I think even I can manage melted cheese on bread.
J


After our quick meal we headed over to the theater to burn off our dinner by laughing non-stop for the next hour and a half. Seriously after the first 10 minutes I looked at Boy and told him that I didn’t think I was going to make it through the whole show. My cheeks and sides already hurt from laughing so hard. In the end I decided that if I ever get to choose my mode of death, I choose to die laughing!


Here is a picture of us. Tina Fey and Steve Carell are almost as cute as we are.


Gwenevere

Tuesday, November 1, 2011

Carver's Salad - Baking Bad's Virtual Fall Feast

A little confession....I heard there was a virtual feast being planned by Baking Bad, I wanted to participate, so I asked a friend if she could squirrel me an invite. Despite my lackadaisical blogging patterns, these fantastic bloggers took a chance and let me participate. Thank you and although I don't deserve to rub shoulders with all of you, I more than appreciate you allowing me the opportunity to do so.  

So here we have it a virtual fall feast...the word “feast” brings lots of great images to mind and the one I’m focusing on for this post is a finely set table.

(and hey, I know this type of picture isn't in the preferred style by all the food porn sites 
but I'm really diggin the grain, shadow and subtle color tones)

Growing up, Sunday dinner was a formal affair in my home. Well, formal in that Mom brought out the fine china and the table was formally set with linens, chargers and all the elements that make for an elegant meal. My parents wanted my three brothers, my sister and me to be exposed to the “finer” things in life, formal Sunday dinner was one attempt to tackle this goal. I think they did a pretty good job. We learned to eat with one hand in our lap, how to say, “please pass” and “thank you”. Some us know how to fold fancy napkins and I’m pretty sure we all know which side of the plate our spoon goes on. That however is where our formal training ended. Our topics and manner of discussion could never quite live up to the formality of the occasion.
J


There were no defined social boundaries during Sunday dinner. There were no parents and no children, we were contemporaries and [mostly] treated one another as such. No topic was off limits and no point of view was shunned. We were given a stage to articulate our thoughts and sometimes the discussion was animated and loud, sometimes someone left crying and more often, we laughed so hard that someone sprayed beverage out of their mouth (or nose).

It all seems perfectly normal to each of us but every time someone new comes for dinner we are reminded of how skewed our sense of normal really is – AND I LOVE IT! I love it so much that the most important item on my wedding registry was my fine china. I wanted to extend this tradition to my own family. I want my kids to learn how to be open and honest with their thoughts and feelings and I want them to be able to have great memories of the instances that these lessons are learned.


Sure I don’t have a dining room or a place to even pretend that we are somewhere more formal than where we really are, but you know me, I’m not going to let that stop me. What we lack in location we more than make up for in character and [sometimes in] food.
J 


This salad is my attempt to introduce my kids to fancy food. Yes, I have to leave off the toasted almonds but the apples and craisins are a hit. The honey cider dressing helps too. 

Bon Appetit!

Carver’s Salad

serves: 8
Ingredients:
1 small bunch baby spinach  (washed, dried and chilled)
1 head romaine lettuce (washed, dried and chilled)
1 head red leaf lettuce (washed, dried and chilled)
1 16 oz. bag raisins
1 cup sliced almonds, *roasted
1 golden delicious apple, sliced or cut into pieces

Honey Cider Dressing:
3 Tablespoons cider vinegar
3 Tablespoons honey
6 Tablespoons mayonnaise
1 Tablespoon dijon mustard
1 ½ Tablespoons finely minced onion
1 ½ Tablespoons chopped fresh parsley
¾ Cups Oil 

Directions:
Honey Cider Dressing:
  1. In a small microwave safe dish or in a saucepan, heat cider vinegar and honey together until honey dissolves.
  2. In small bowl whisk mayonnaise and Dijon mustard together until smooth
  3. Add in onion, fresh parsley, honey and cider vinegar then whisk together until combined.
  4. Whisk in the oil to emulsify then chill in the fridge until ready to serve.
Salad:
  1. In a large salad bowl, toss lettuce, apples, craisins and *roasted almonds. If eating immediately, toss the salad with dressing and serve.

Notes: To toast almonds: Preheat oven to 350 degrees F. Spread pre-sliced almonds on a baking sheet in a single layer and put in the oven for 10-20 minutes. Watch them closely to be sure they do not over roast.

Source: Dina’s Diner (unpublished) / family recipe

Gwenevere

Friday, October 21, 2011

Steph's Virtual Bridal Shower - Dinner in a Pumpkin


When Kita sent me the invitation to help support Steph (a fellow blogger) with her upcoming wedding by being a part of a virtual Bridal Shower I was ALL IN! As much as I love dressing up in a dry-clean only gown in order to spend an evening keeping four kids, also clad in dry-clean only attire, away from the chocolate fountain bubbling in the corner, a virtual bridal shower sounded more than ideal.

The theme for the bridal shower is “Date Night” and in order to come up with a suitable idea I had to go back 14 years and remember what we did for date night when we were newlyweds…well besides spending our Saturday’s pretending to be interested in furniture just so we could get free hot dogs and soda at the local furniture store, we also liked to watch the TV’s shows we had recorded throughout the week on our VHS recorder or grab a bite to eat at the local hospital cafeteria after our Friday night volunteer shift was over. Yeah! We were pretty wild and crazy back then.

Surely we did other stuff too?  I consulted the photo album. Ahhhh yes, our first Halloween together. We hosted a murder mystery night with all of our friends from school. Look how cute we were! (and no we were not dressed up as ghosts, we just had no idea how to use a flash properly.)


It was great looking back at our first Halloween together and I realized that a tradition began that year….Pumpkin Hunting.

Since we have been married, we have always enjoyed searching for the perfect Jack-o-lantern pumpkin together. It’s the perfect date regardless of the variation you choose. We would either go to a local farm stand to pick up our pumpkin and then take some time browsing the stand and gift shop. We’d grab a bag of hot sugared pumpkin donuts and a class of cold apple cider to enjoy while we sat at a picnic table and talked about whatever crossed our minds.  Once the sun had set and I was sufficiently frozen we’d drive home. Sometimes we’d carve the pumpkin right away but usually we would save that for another date night. For carving night, we take the time to carve the pumpkin and then we’d eat roasted seeds while watching a rented movie (not a scary one…remember? I don’t do scary well).

As the years have gone by our tradition has stuck and now we enjoy doing this with our kids. Today our pumpkin patch haul includes 6 carving pumpkins  (1 for every member of the family) and about 3 or 4 sugar/pie pumpkins to be used for whatever baking treat needed baked.  And that brings us to the food….Date Night wouldn’t complete without something to eat right? I present to you... 

Dinner in a pumpkin! 


I got this recipe from my good friend Camille who we met while we lived in Michigan (when/if you have kids Steph, you’ll defiantly want to check out her blog, A Curious Thing, filled with reviews on children’s lit). Although the recipe is enough to feed 6-8 adults, you can easily stash away half of the filling in the freezer and use it on another night (You know me, I’m a fan of make-a-head meals).

Good luck Steph. I wish you the very best on your wedding day and everyday after. Your marriage will be worth every effort you put into it and I hope you and Lucas are able to start traditions that you will look forward to participating in year after year after year.

Congratulations!!

Dinner in a Pumpkin

serves: 8
Ingredients:
4 small pie pumpkins, prepared with top cut and strings and seeds removed.
1 lb. sausage
1 lb. ground beef
1 large sweet onion, finely diced
2 large celery rib, finely diced
3 cups cooked brown rice
1 can cream of chicken soup
3 tablespons brown sugar
3 tablespoons soy sauce
1 can (8oz) sliced water chestnuts, chopped

Directions:
  1. Preheat oven to 350 degrees Fahrenheit.
  2. In a large skillet brown the sausage and beef with the chopped onion and celery.  When done, drain and return to the skillet. Add rice, cream of chicken soup, brown sugar, soy sauce and water chestnuts then stir and heat together. Simmer for about 10 minutes on medium low heat.
  3. Spoon the filling into each cleaned pumpkin shell until stuffed. Place tops onto each pumpkin, place pumpkins on a cookie sheet and back for 1 to 1 ½ hours.
  4. Dinner is done when the inside of the pumpkin easily peals away from the skin with a fork. Excellent served with a bit of cheese sprinkled on top.

Gwenevere

Sunday, October 2, 2011

Fajita Steak Sandwiches


I don’t even know where to start with this post. Should I just pretend that it hasn’t been THREE WEEKS since I last posted?! (how did that happen?) Or should I fill you in on all the nitty gritty details that have kept me away from the blog? If I do the latter, I may drive many of you away because that means I’ll be forced to explain the inner workings of my psyche to you and that could just get scary. :)

In order to keep you around for just a bit longer (because I do so love your company), today I’m going to just quickly say that the past few weeks have been a bit of a mental and spiritual challenge for me.  Because this challenge has had such a profound effect on me, I really want to share bits of it with you but first I want to finish what I’ve started. That means, I want to show you the third recipe of my [non]trifecta and how I said adieu to a wonderful summer. Remember summer? it seems like a lifetime ago. The weather here turned cold on Labor Day and even though I tried to hold onto it as long as I could, summer just wouldn’t have it. I had to let it go.

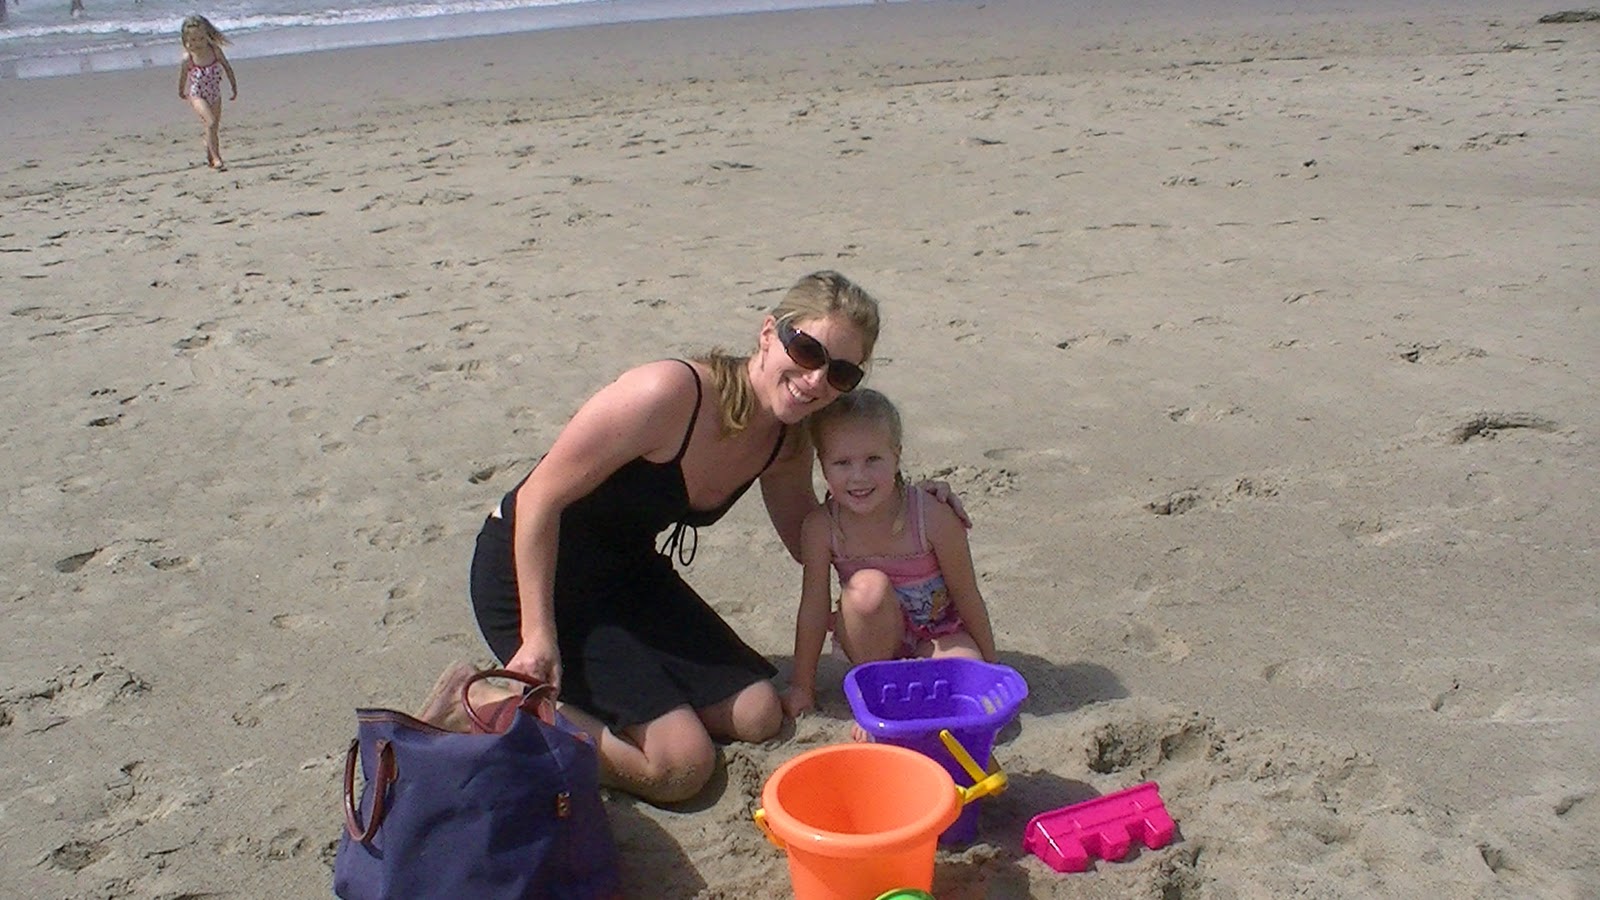
Well, a week before school started this year we packed up the family car and drove from Indianapolis to the Oregon Coast to vacation with my family. It was so great. We kicked up our feet and just soaked in the greatness of being together. Kids played, adults debated, we all laughed. It was perfect. See for yourself.


To be sure that no one was stuck in the kitchen more than anyone else, we divided dinner duty up amongst each family. For my dinner I chose Fajita Steak Sandwiches, the third component to the trifecta of bun, filling and side. 


This is a favorite in our house and the kids are almost always guaranteed to gobble it up. It’s quick, easy and so darn tasty! The only mistake I made was that I didn’t calculate enough for people to have seconds. So when you make these, calculate enough for people to have seconds…I promise it will get eaten.


Fajita Steak Sandwiches

serves: 4
Ingredients:
1 pound beef sirloin, cut into 1/8 inch strips then cut into 1-inch squares
3 tablespoons cooking oil
1 onion, sliced
1 green bell pepper, julienne
1 red bell pepper, julienne
3 ounces deli sliced cheese, (I prefer pepper jack. swiss, or provolone) 
4 deli buns, split lengthwise
½ teaspoon salt
½ teaspoon black pepper
½ teaspoon paprika
½ teaspoon chili powder
½ teaspoon onion powder
½ teaspoon garlic powder
½ teaspoon dried thyme
½ teaspoon dried marjoram
½ teaspoon dried basil

Directions:
  1. In a small bowl, mix together spices (salt, pepper, paprika, chili powder, onion powder, garlic powder, thyme, marjoram and basil). Sprinkle over beef and toss to coat.
  2. Heat half of the oil in a skillet over medium-high heat. Sauté beef to desired doneness, and remove from pan. Heat the remaining oil in the skillet, and sauté the vegetables until they reach desired doneness.
  3. Preheat oven on broiler setting.
  4. Divide the meat between the bottoms of 4 rolls, layer with vegetables, and then top with sliced cheese. Place on cookie sheet, and broil until cheese is melted. If desired spread fresh guacamole and/or sour cream over the bun top then replace the bun top over the broiled bottom and serve (with onion rings or zucchini fries).
Gwenevere
Related Posts Plugin for WordPress, Blogger...